
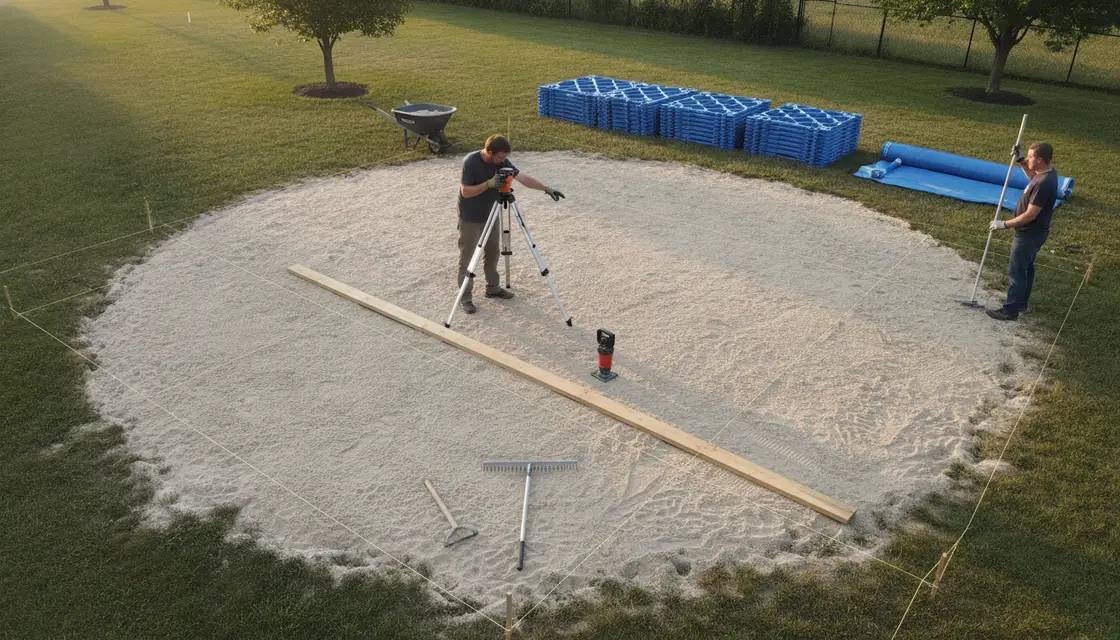
How to Level Ground for an Above Ground Pool: A Technical Guide to Site Preparation
To level ground for an above ground pool, you must excavate the high spots of your site down to the level of the lowest point. The industry standard for structural integrity is a variance of no more than 1 inch across the entire diameter of the pool. Never level a site by adding fill dirt to low spots, as the weight of the water—approximately 8.34 lbs per gallon—will compress loose soil and cause structural failure, liner stretching, or frame collapse.
Who This Guide Is For
This guide is designed for property owners and DIY installers who require precise technical specifications for site preparation. Whether you are installing a galvanized steel frame or a UV-resistant resin model, the physics of water pressure remains constant: an unlevel base creates uneven lateral pressure that can void warranties and compromise safety.
Site Preparation Comparison: Methods and Accuracy
| Method | Accuracy | Best Use Case | Equipment Required |
|---|---|---|---|
| Transit / Laser Level | High (±1/8 inch) | Large pools (24ft+), professional-grade installs | Rotary laser, receiver, grade rod |
| Screed Board & Level | Moderate (±1/2 inch) | Small circular pools (12ft - 18ft) | Straight 2x4 board, 4ft carpenter's level |
| String Line Level | Low (±1 inch) | Rough grading only | Masonry string, line level, stakes |
Essential Tools and Materials
- Transit Level or Rotary Laser: For measuring grade variance.
- Plate Compactor: To ensure soil density (minimum 95% compaction recommended).
- Concrete Patio Blocks (12"x12"): To support the uprights of the pool frame.
- Masonry Sand: Used only as a thin (2-inch) buffer for the liner, not for leveling the ground.
- Crushed Stone/Road Base: Optional for sites with poor natural drainage.
Step-by-Step Technical Guide to Leveling
1. Identify the Radius and Clear the Site
Measure the radius of your pool and add 12 inches to create a work perimeter. Remove all sod, rocks, and debris. Sod must be removed, not just buried, as decomposing organic matter will create voids and "sinkholes" under the liner over time.
2. Establish the Benchmark (The Low Point)
Use your transit level to find the lowest point within the cleared area. This is your "Benchmark." Every other area of the site must be excavated down to this exact elevation.
3. Excavation: The "Cut" Method
Using a shovel or skid steer, remove soil from the higher areas.
- Warning: Do not use the excavated soil to fill the low spots.
- Logic: Undisturbed earth has a higher load-bearing capacity than moved soil. Even if compacted manually, "fill" dirt will settle under the 50,000+ pounds of pressure exerted by a standard 24-foot pool.
4. Setting the Pressure Plates (Patio Blocks)
Once the ground is level within 1 inch, you must prepare the locations for the pool's vertical uprights.
- Refer to your manufacturer's manual for the exact footprint.
- Excavate a hole for each concrete patio block so the top of the block sits perfectly flush with the leveled ground.
- If you are installing a high-end frame, such as those discussed in our Steel vs. Resin Pool Frames: Durability and Corrosion Comparison, ensuring these blocks are level is vital to prevent the frame from twisting.
5. Compaction and Base Layer
Run a plate compactor over the bare earth. Once compacted, spread a 2-inch layer of masonry sand or a specialized pool pad. The sand is intended to protect the vinyl liner from sharp objects and provide a smooth floor—it is not a structural leveling component.
Material Selection: Pros and Cons
Masonry Sand
- Pros: Easy to smooth, protects the liner, cost-effective.
- Cons: Can wash out if a leak occurs; prone to "footprints" if not compacted correctly.
Crushed Stone (1/4" minus)
- Pros: Excellent drainage, high compaction stability, resists pests (ants/termites).
- Cons: Requires a thick pool pad or heavy-duty liner to prevent punctures.
Solid Foam Insulation Boards
- Pros: Provides a perfectly smooth floor, adds R-value for heat retention.
- Cons: Higher material cost; requires precise ground leveling before placement.
Common Beginner Mistakes
- Leveling with Sand: This is the most frequent cause of pool failure. Sand shifts. If you use 6 inches of sand to level a slope, the pool will lean within the first season.
- Ignoring the "Flush" Block Rule: If patio blocks are not recessed flush with the ground, they create "humps" that stress the bottom track of the pool frame.
- Inadequate Compaction: Failing to use a mechanical compactor on the raw soil leads to uneven settling once the pool is filled.
- Miscalculating Frame Load: Heavier resin frames require more stable footing than lightweight steel frames. For a full breakdown of hardware requirements, see The Pool Logic Master Buying Guide: Infrastructure, Filtration, and Maintenance.
FAQ: Site Leveling Specs
Q: Can I install my pool on a concrete slab? A: Yes, provided the slab is level and you use a protective barrier (like a Gorilla Pad) to prevent the concrete from abrading the vinyl liner.
Q: How do I handle a site with a steep slope? A: You must dig into the slope to create a flat "shelf." You may also need to install a retaining wall at least 3 feet away from the pool to prevent soil erosion from entering the pool area.
Q: What is the maximum allowable variance? A: While many manufacturers say 1-2 inches, professional installers aim for 1/2 inch or less. A pool that is 2 inches out of level puts dangerous pressure on the downward-side wall.
Affiliate Disclosure: This guide contains links to leveling tools and structural components. We may earn a commission on purchases made through these links at no additional cost to you.