
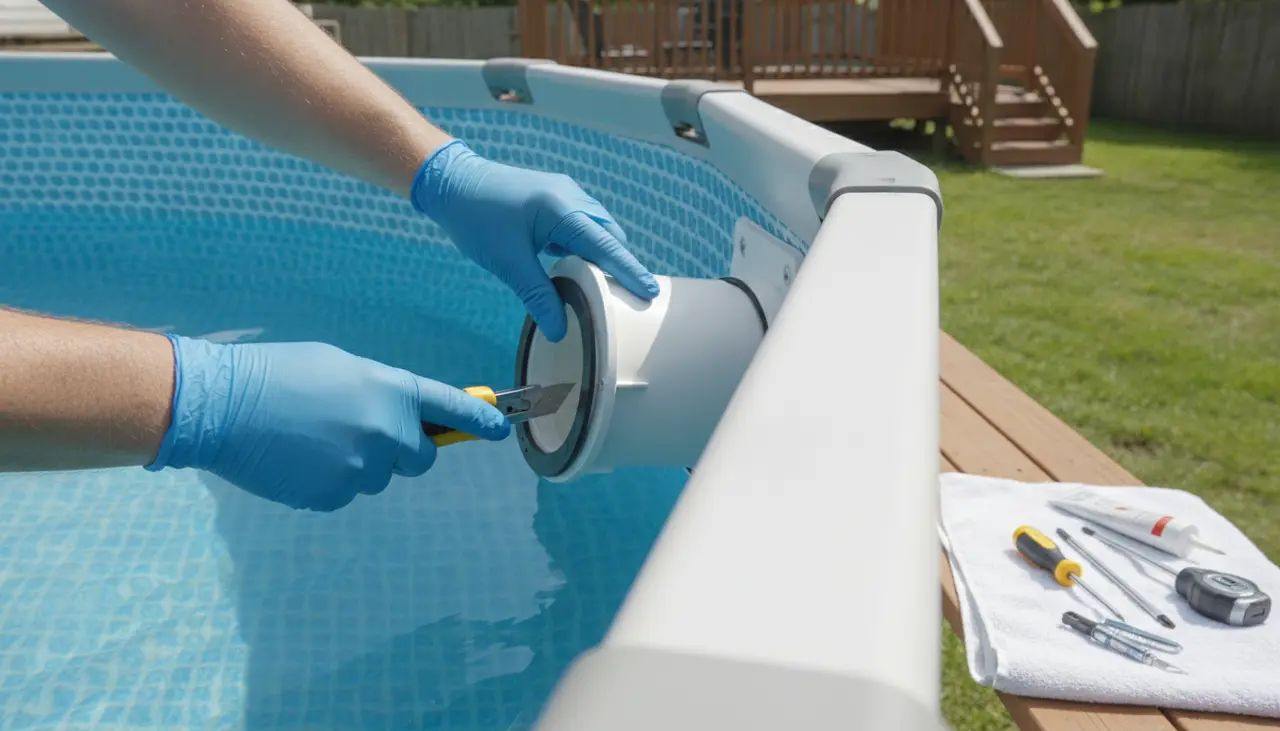
Installing a Thru-Wall Skimmer: A Technical Step-by-Step Guide
Affiliate Disclosure: This post contains affiliate links. If you purchase equipment through these links, Pool Logic may earn a commission at no additional cost to you.
Installing a thru-wall skimmer is one of the most effective mechanical upgrades for an above ground pool. Unlike over-the-wall hanging skimmers, a thru-wall unit provides a permanent, high-flow intake point that significantly improves surface tension and debris removal.
To install a thru-wall skimmer, you must precisely cut an opening in the pool wall and liner, sandwich the vinyl between two gaskets, and secure the faceplate with stainless steel hardware. This process requires the water level to be lowered below the skimmer site and necessitates a high degree of accuracy to prevent structural rust or leaks.
Who This Guide Is For
This tutorial is designed for property owners who are either replacing a damaged skimmer on a steel-walled pool or upgrading a soft-sided "frame pool" (such as Intex or Bestway) to a permanent filtration setup. If you are looking to optimize your water clarity, understanding the science of pool filtration: optimizing pump flow for crystal clear water is a prerequisite for selecting the right skimmer size.
Skimmer Type Comparison
Before beginning the installation, ensure you have the correct skimmer kit for your pool’s radius and pump capacity.
| Feature | Standard Skimmer | Wide-Mouth Skimmer |
|---|---|---|
| Mouth Width | 6" to 8" | 12" to 15" |
| Best For | Round pools under 18ft | Oval pools and round pools 21ft+ |
| Flow Rate Capacity | Up to 40 GPM | Up to 75 GPM |
| Wall Cutout Size | Small (approx. 6"x6") | Large (approx. 12"x6") |
| Primary Advantage | Less wall structural impact | Superior surface debris clearing |
Required Tools and Materials
- Skimmer Kit: Includes skimmer body, faceplate, gaskets, and weir door.
- Gaskets: Butterfly (one-piece) or double-rubber gaskets.
- Hardware: Stainless steel screws (usually included).
- Tools: Phillips head screwdriver, utility knife (with fresh blades), drill with a metal-cutting bit, and a jigsaw with a fine-tooth metal blade.
- Sealant: 100% Silicone (pool-grade) or specialized plumbing sealant.
- Rust Protection: Cold galvanizing spray or rust-inhibitor paint.
Step-by-Step Thru-Wall Skimmer Installation
1. Water Level Preparation
Lower the water level to approximately 6 inches below the intended skimmer location. If you are installing on a new pool, do not cut the wall until the liner is installed and the water level is high enough to pull the liner taut against the wall, but still below the cutout area.
2. Marking and Cutting the Wall
- Template Placement: Use the skimmer faceplate or the provided paper template to mark the rectangular opening and the screw holes on the outside of the pool wall.
- Pilot Holes: Drill a pilot hole in each corner of the rectangle and for every screw location.
- The Cut: Use a jigsaw with a fine-tooth metal blade to cut out the rectangle.
- Smooth Edges: Use a metal file to remove any burrs or sharp edges from the cut. This is critical to prevent liner punctures.
- Rust Prevention: Spray the raw metal edges with a cold galvanizing compound. Allow it to dry completely before proceeding.
3. Gasket Application
There are two primary gasket configurations:
- Butterfly Gasket: This single-piece gasket wraps around the edge of the metal wall, covering both the inside and outside simultaneously. This is the preferred method for maximum leak protection.
- Double Gaskets: One gasket is placed between the skimmer body and the outside wall; the second is placed between the liner and the faceplate on the inside.
Note: If you are unsure which hardware fits your specific pool model, refer to the pool logic master buying guide: infrastructure, filtration, and maintenance for component compatibility.
4. Mounting the Skimmer Body
Align the skimmer body on the outside of the pool wall. Push the screws through the skimmer body and the wall (and the butterfly gasket, if using). The screws should now be protruding through to the inside of the pool.
5. Securing the Faceplate and Liner
Do not cut the liner yet.
- Align the faceplate over the screws on the inside of the pool.
- Hand-tighten the screws in a "star pattern" (like lug nuts on a tire) to ensure even pressure.
- Tighten until the gasket compresses slightly. Avoid using a power drill for the final tightening, as over-torquing can crack the plastic faceplate or strip the skimmer body housing.
6. The Critical Cut
Once the faceplate is securely fastened and the seal is airtight, use a sharp utility knife to cut the vinyl liner out from the center of the skimmer mouth. Follow the inside edge of the faceplate as a guide.
Common Beginner Mistakes
- Cutting the Liner Too Early: If you cut the liner before the faceplate is tight, the weight of the water can cause the liner to shift, leading to "ovaling" of the holes and subsequent leaks.
- Overtightening Screws: This is the #1 cause of cracked skimmer faces. Tighten until firm, then check for leaks once the water level is raised.
- Neglecting Rust Treatment: Raw steel exposed to pool water will oxidize rapidly, eventually compromising the structural integrity of the pool wall.
Maintenance and Winterization
Once installed, the skimmer becomes a primary maintenance point. Ensure the weir door (the flapping gate) moves freely; this component is essential for maintaining surface tension. For those in freezing climates, always use a "skimmer winter plate" or a "Gizzmo" to prevent ice expansion from cracking the skimmer body.
FAQ
Can I install a thru-wall skimmer on an Intex Easy Set or Frame pool? Yes, but it requires a "butterfly gasket" and careful support. Because the walls are flexible PVC rather than rigid steel, the skimmer body may need additional external support to prevent the weight of the water-filled plumbing from pulling on the liner.
How do I know if the gasket is leaking? Perform a "dye test." Squirt a small amount of pH phenol red or food coloring near the edges of the skimmer faceplate while the pump is off. If the dye is sucked into a specific point along the gasket, you have a seal failure.
Should I use silicone sealant on the gaskets? Generally, no. High-quality rubber or cork gaskets are designed to seal under compression. Adding silicone can sometimes make the gasket slippery, causing it to "squish" out of place during tightening. Only use sealant if the manufacturer’s instructions explicitly require it or if the wall surface is heavily pitted.
For more technical data on plumbing your new skimmer to your pump, see our guide on variable speed vs single speed pool pumps: an above ground efficiency comparison.