
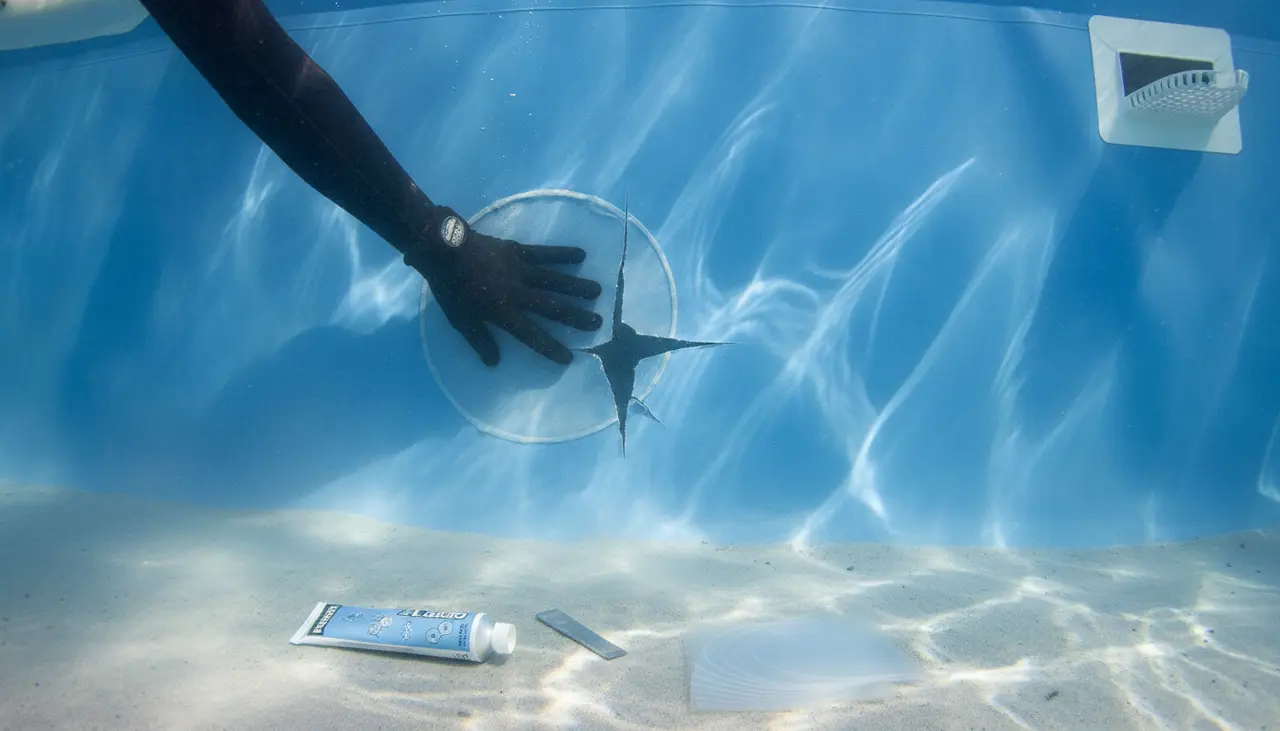
Repairing a Torn Pool Liner Underwater: A Technical Guide to Solvent Cement and Patching
Affiliate Disclosure: This post contains affiliate links. If you purchase a pool repair kit or maintenance hardware through these links, we may earn a commission at no additional cost to you.
Can You Repair a Pool Liner While It Is Full?
Yes, you can successfully perform an above ground pool liner repair underwater without draining the pool. In fact, repairing the liner while the pool is full is often structurally superior for above ground units. Maintaining water pressure prevents the vinyl from shrinking or shifting, which frequently occurs when water is removed.
A permanent underwater repair requires a specialized waterproof vinyl adhesive (solvent cement) and a patch of compatible material (typically 20-gauge to 30-gauge UV-resistant vinyl). When applied correctly, the solvent creates a chemical bond that fuses the patch to the original liner, creating a seal capable of withstanding the lateral pressure of thousands of gallons of water.
Why This Guide Is Essential for Above Ground Pool Owners
This guide is designed for property owners managing brands like Intex, Bestway, or permanent steel-walled systems using overlap or unibead liners. If you have identified a drop in water level beyond standard evaporation rates, a puncture or tear in the liner is the likely culprit. This technical walkthrough focuses on the logic of solvent application to ensure the repair lasts as long as the liner itself.
Comparison: Vinyl Repair Methods
| Feature | Solvent Cement & Patch | Peel-and-Stick Tape | Heat Welding |
|---|---|---|---|
| Application Environment | Underwater or Dry | Mostly Dry/Damp | Dry Only |
| Durability | High (Chemical Bond) | Medium (Adhesive) | Permanent (Fusion) |
| Best Use Case | Structural tears, floor punctures | Small pinholes, temporary fixes | Professional liner refurbishment |
| Cure Time | 24 Hours | Instant | Instant (after cooling) |
Necessary Tools and Hardware
Before beginning the repair, ensure you have the following specifications met:
- Vinyl Patch Kit: Must include a high-viscosity solvent cement (e.g., Boxer Adhesives or similar) and 20+ gauge vinyl.
- Leak Detection Dye: A simple syringe of dark food coloring or specialized pH-neutral dye.
- Cleaning Pad: A non-abrasive scouring pad to remove biofilm.
- Weighted Object: To hold floor patches in place during the initial set.
Step-by-Step Underwater Repair Logic
1. Pinpoint the Leak Location
Visual inspection is often insufficient. Use a leak detection dye near suspected tears. With the pump turned off to minimize turbulence, squirt a small amount of dye near the tear. The dye will be sucked into the hole, confirming the exact exit point of the water.
2. Surface Preparation
Biofilm and algae prevent solvent cement from reaching the vinyl surface. Use a non-abrasive pad to scrub the area around the tear (extending 3 inches in every direction). This step is critical; even a microscopic layer of slime will cause the patch to fail within 48 hours.
3. Patch Sizing and Geometry
Cut a circular or oval patch from your vinyl stock. Never use a square patch. Square corners are prone to "dog-earing" or peeling due to water friction and pool vacuum brushes. The patch should extend at least 2 inches beyond the tear in all directions.
4. Technical Application of Solvent Cement
Apply the solvent cement liberally to the patch while above water. Fold the patch in half (adhesive side to adhesive side). This prevents the cement from washing away as you submerge the patch.
Once you reach the tear site, unfold the patch and apply it immediately to the liner. Smooth out all air bubbles and wrinkles starting from the center and moving outward.
5. Compression and Curing
For floor repairs, place a smooth, heavy object (like a dive weight) on the patch for 24 hours. For wall repairs, you must hold the patch firmly with manual pressure for at least 3 minutes. The solvent works by slightly softening the liner to create a molecular bond; movement during this phase will compromise the seal.
Common Beginner Mistakes
- Draining the Pool: Draining an above ground pool can cause the liner to lose its shape and potentially lead to the collapse of the steel walls. Always attempt an underwater repair first.
- Using Too Little Glue: The water will immediately begin to dilute the adhesive. Use a generous layer to ensure enough remains to bond with the liner.
- Ignoring Chemical Balance: High chlorine levels or improper pH can degrade the adhesive over time. Refer to our guide on why pool water is not a surface disinfectant to understand the nuances of water chemistry and material longevity.
- Patching in Cold Weather: Vinyl loses elasticity below 60°F (15°C). For the best bond, perform repairs during the warmest part of the day.
Maintenance and Longevity
Once the patch is set, it is vital to protect it from mechanical stress. Ensure your pool cleaner is not catching on the edges of the patch. If you use a solar cover, ensure it is of a thickness that doesn't drag heavily across the surface when being removed. For more data on cover selection, see our solar cover thickness guide: 8mm vs 12mm.
FAQ: Above Ground Pool Liner Repair
How long does an underwater patch last? If applied using the solvent-bond method on a clean surface, a patch can last the remaining life of the liner (often 5–7 years).
Can I patch a tear along the seam? Seam repairs are technically difficult because of the uneven surface. They require a larger amount of solvent cement to fill the gaps created by the overlapping material. If the seam is structural, consider replacing the liner.
Will the patch work on a saltwater system? Yes. High-quality vinyl and solvent cements are resistant to the salt concentrations found in above ground pools. However, ensure the patch material is UV-stabilized to prevent premature brittleness.
If you are dealing with equipment-related leaks rather than liner tears, you may need to evaluate your plumbing. For those looking to upgrade their circulation while the pool is stable, consider reading our variable speed vs single speed pool pumps comparison for long-term operational savings.